0. Pre-course setup#
We want to make sure everyone’s ready to go before the first lesson begins!
This module will guide you through installing and configuring the two bits of software needed for the course: VS Code and conda.
If you encounter any issues, please let us know in the pre-course survey.
Note: These install instructions assumes a windows machine with Windows 10 operating system, but should apply to most operating systems.
Step 1: Install Conda#
Conda (Anaconda) is a tool for managing Python dependencies. It was created to make it easy to install scientific computing Python packages.
Go to the conda website and download the Windows installer.
Double click the
.exethat was downloaded to run the installer.You can accept all the default options, including “Install for just me”.
Once conda in installed, you can exit without launching Anaconda Navigator: we won’t be using it for this course.
Ok, lets try it out! From the Start menu, launch Anaconda PowerShell Prompt.
The logo looks like this:

Conda also installs Anaconda Prompt. We won’t be using the plain prompt for this course, as the PowerShell version has more features and is more user friendly.
No worries if you’re new to conda or the command line: try to follow along for now, we’ll cover these topics properly in the first lesson.
Inside the prompt, type
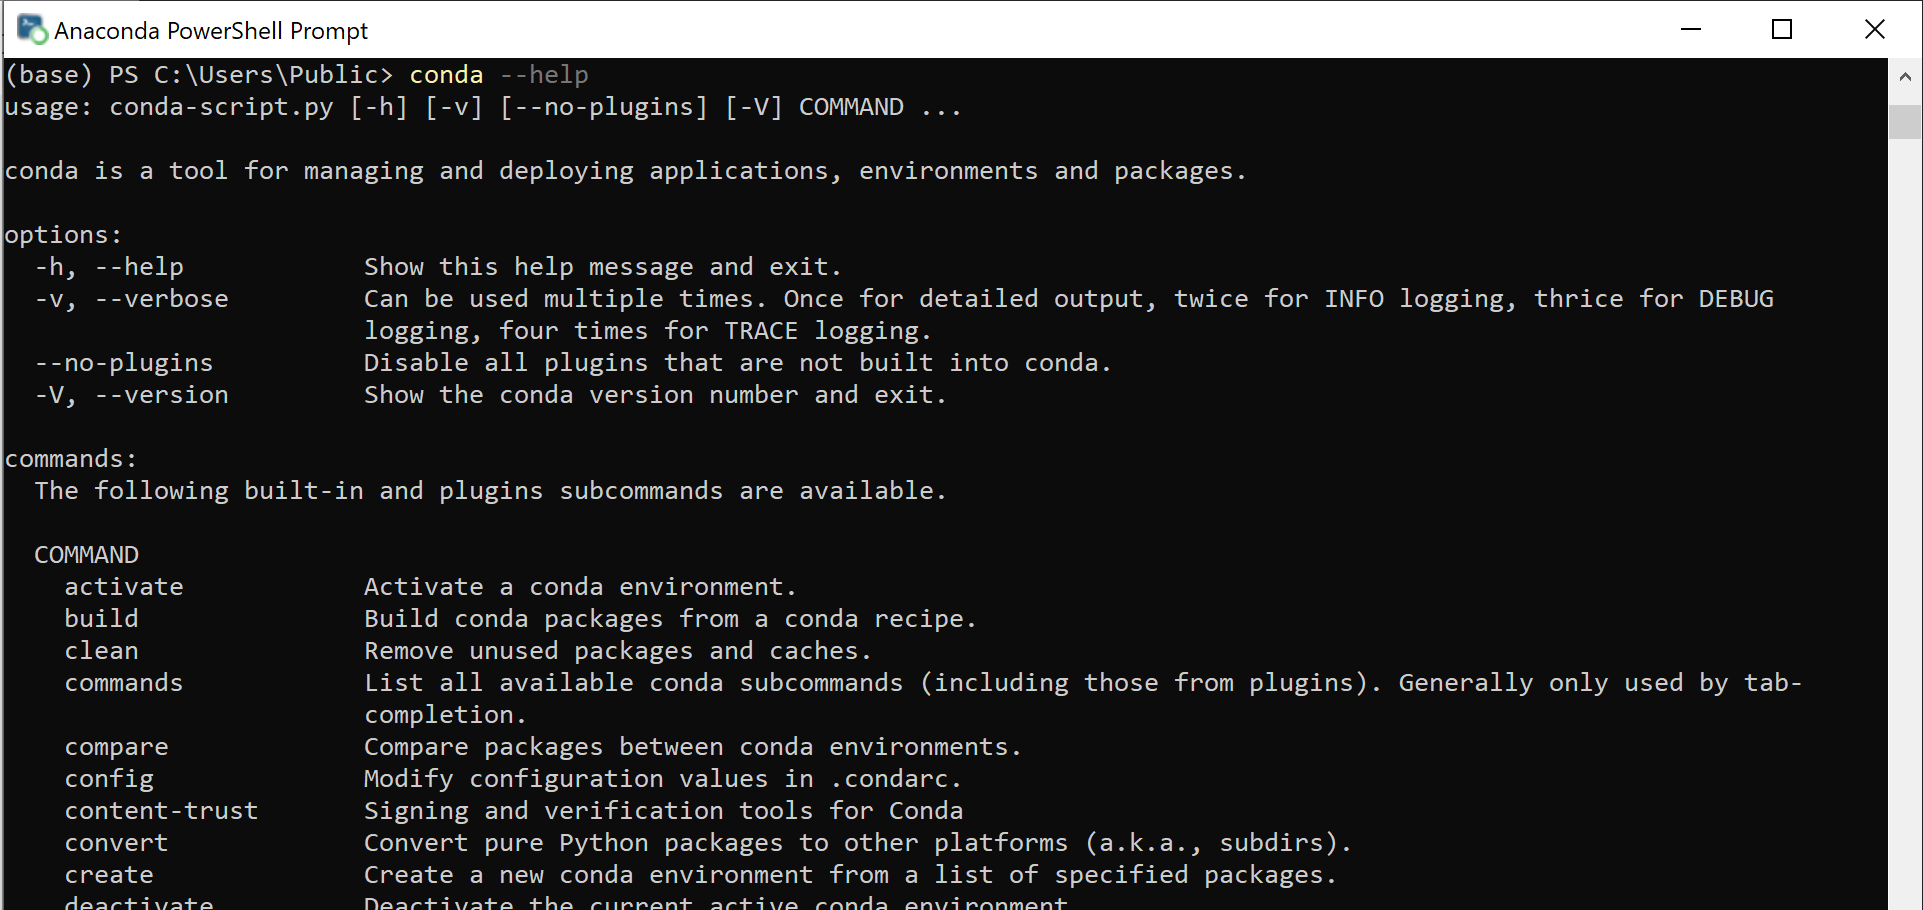
conda --helpthen press ENTER. You should see a list of commands, indicating a successful install of conda.
Definition of Success: You can run the conda --help command and see the output below:
Step 2: Configure Conda#
We put together a conda environment that contains all the Python packages and remaining software needed for the workshop. You can also use this environment for your own data science projects!
Create a folder called
py4wrds. You can do all course-related development inside this folder.Download this environment.yml file into your new
py4wrdsfolder.Right click the link
Select “save link as”
Navigate to your
py4wrdsfolderEnsure the filename is
environment.yml
Open Anaconda prompt. Type
cdfollowed by a space then the full path to your folder. Then press ENTER For me this looked like:cd C:\\Users\Public\py4wrds
Type
conda env create --file environment.ymland press ENTER. You should see a loading message like “Collecting package metadata”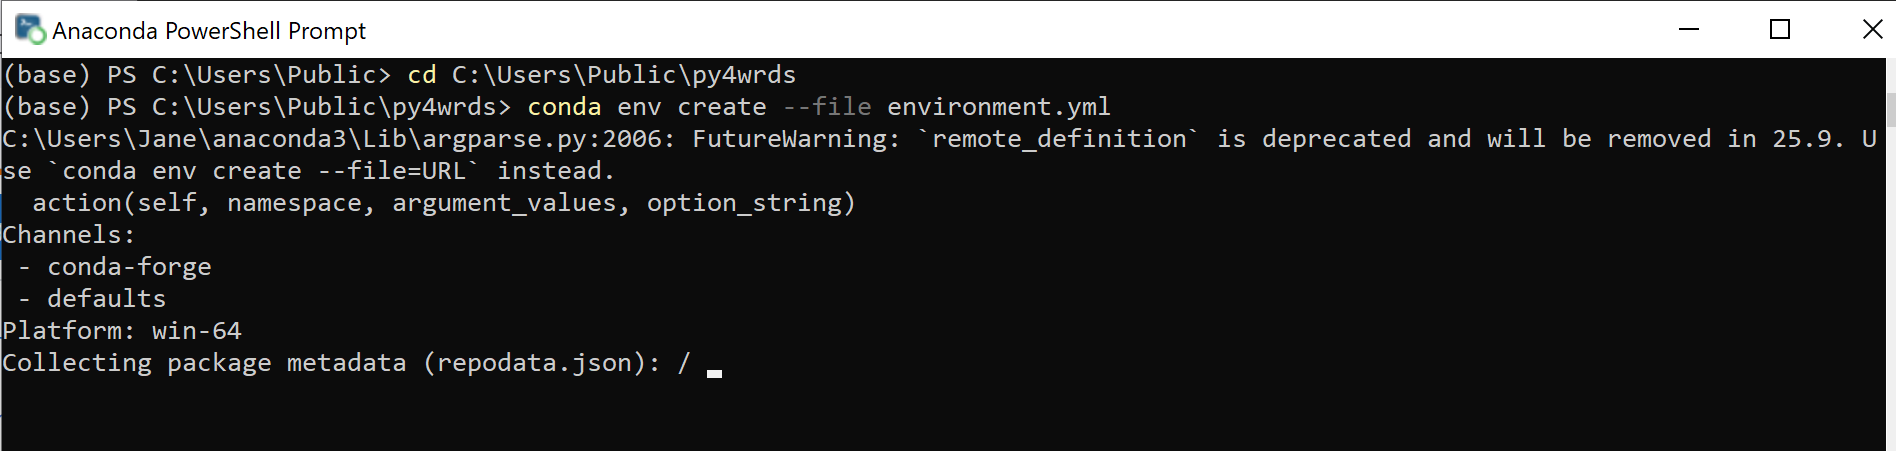
It can take over 45 minutes to install the full environment! Luckily this only has to be done once, and adding new packages in the future will be much faster.
Conda will go through the following steps
Collecting package metadata(~ 1 min)Solving environment(up to 30 minutes)Downloading and Extracting Packages(up to 10 minutes, there are progress bars for each dependency during this step)
Conda may show some warning messages during the setup. As long as you can successfully activate the
py4wrdsenvironment (see the next step) then the installation has succeeded and the warnings are safe to ignore. That said, feel free to reach out about any warnings!Some users reported seeing the
conda env createcommand finish with aPip subprocess error: access is denied. As long as you can still successfully activate the environment, this should be fine.
When it’s done, you should see a
donemessage: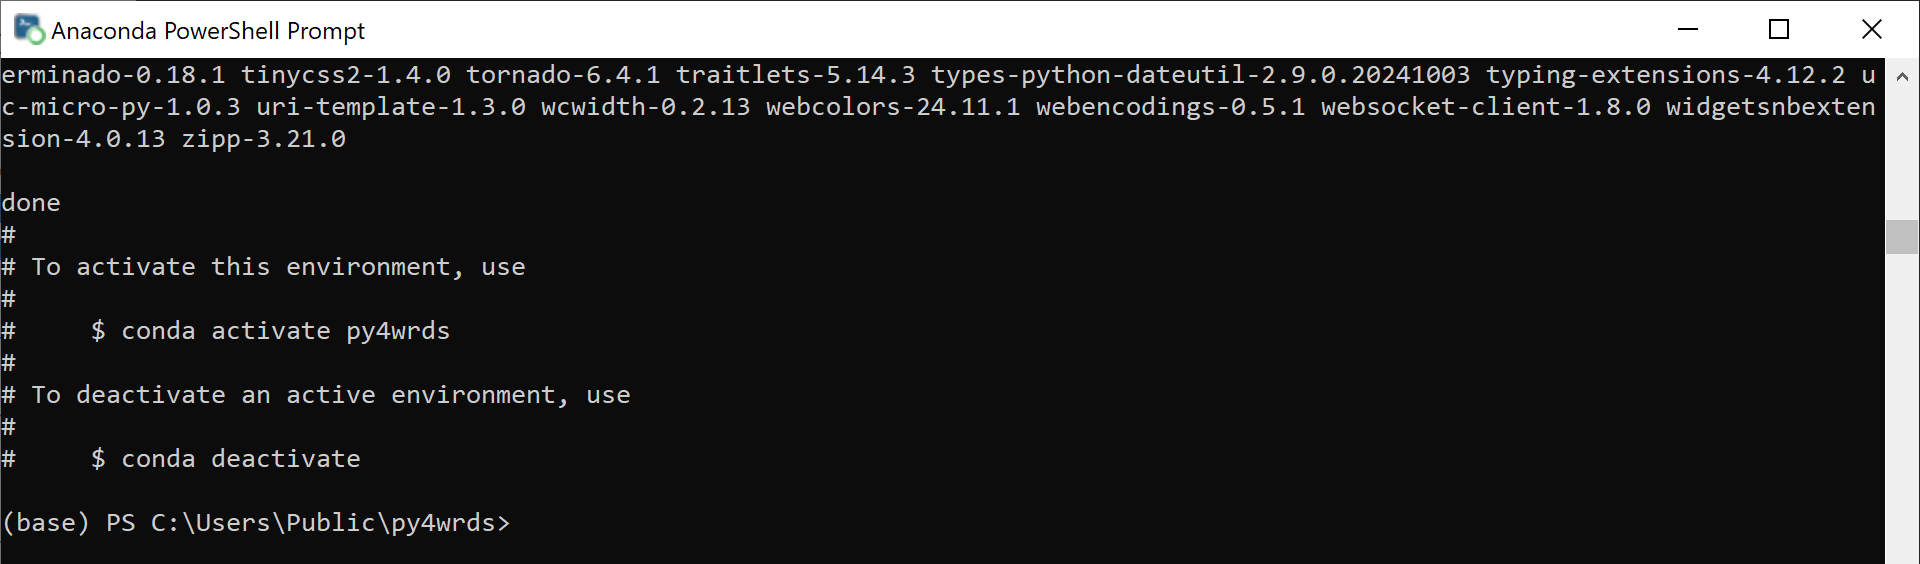
From now on whenever we launch the conda prompt, you should run the command
conda activate py4wrdsto switch to your new environment with all your data science Python tools. After running this command, you should see the text at the start of each new line change from(base)to(py4wrds). This indicates the active environment.
Definition of Success: You can run the conda activate py4wrds command in Anaconda PowerShell prompt without any error messages.
Step 3: Test Jupyter Install#
Open Anaconda PowerShell prompt. Activate the py4wrds environment we created.
Next, type jupyter notebook, and verify that the command opens your browser window to http://localhost:8888
Definition of Success: You can run the jupyter notebook command in Anaconda PowerShell prompt without any error messages.
Step 4: Download course materials#
Download materials for the course, and place them within the py4wrds folder you created on your computer.
[OPTIONAL] Step 5: Install VS Code#
Visual Studio Code (VS Code) is a lightweight, free, and open-source code editor developed by Microsoft.
VS Code (Visual Studio Code) is another widely used development environment. It can edit Python files and notebooks, and comes with a number of tools to streamline Python software development.
You can complete this course using either jupyter notebook or VS Code.
Why Use VS Code?#
VS Code is widely used because it combines the simplicity of a code editor with features of a full-fledged Integrated Development Environment (IDE). This makes it very popular among python developers
For Python, VS Code provides support with the Python extension, enabling features like virtual environment management, Jupyter Notebook integration, and debugging.
Install Instructions#
Go to the VS Code website and download the installer for Windows.
Double click the
.exefile you downloaded to run the installer.You can accept all the default options in the install process.
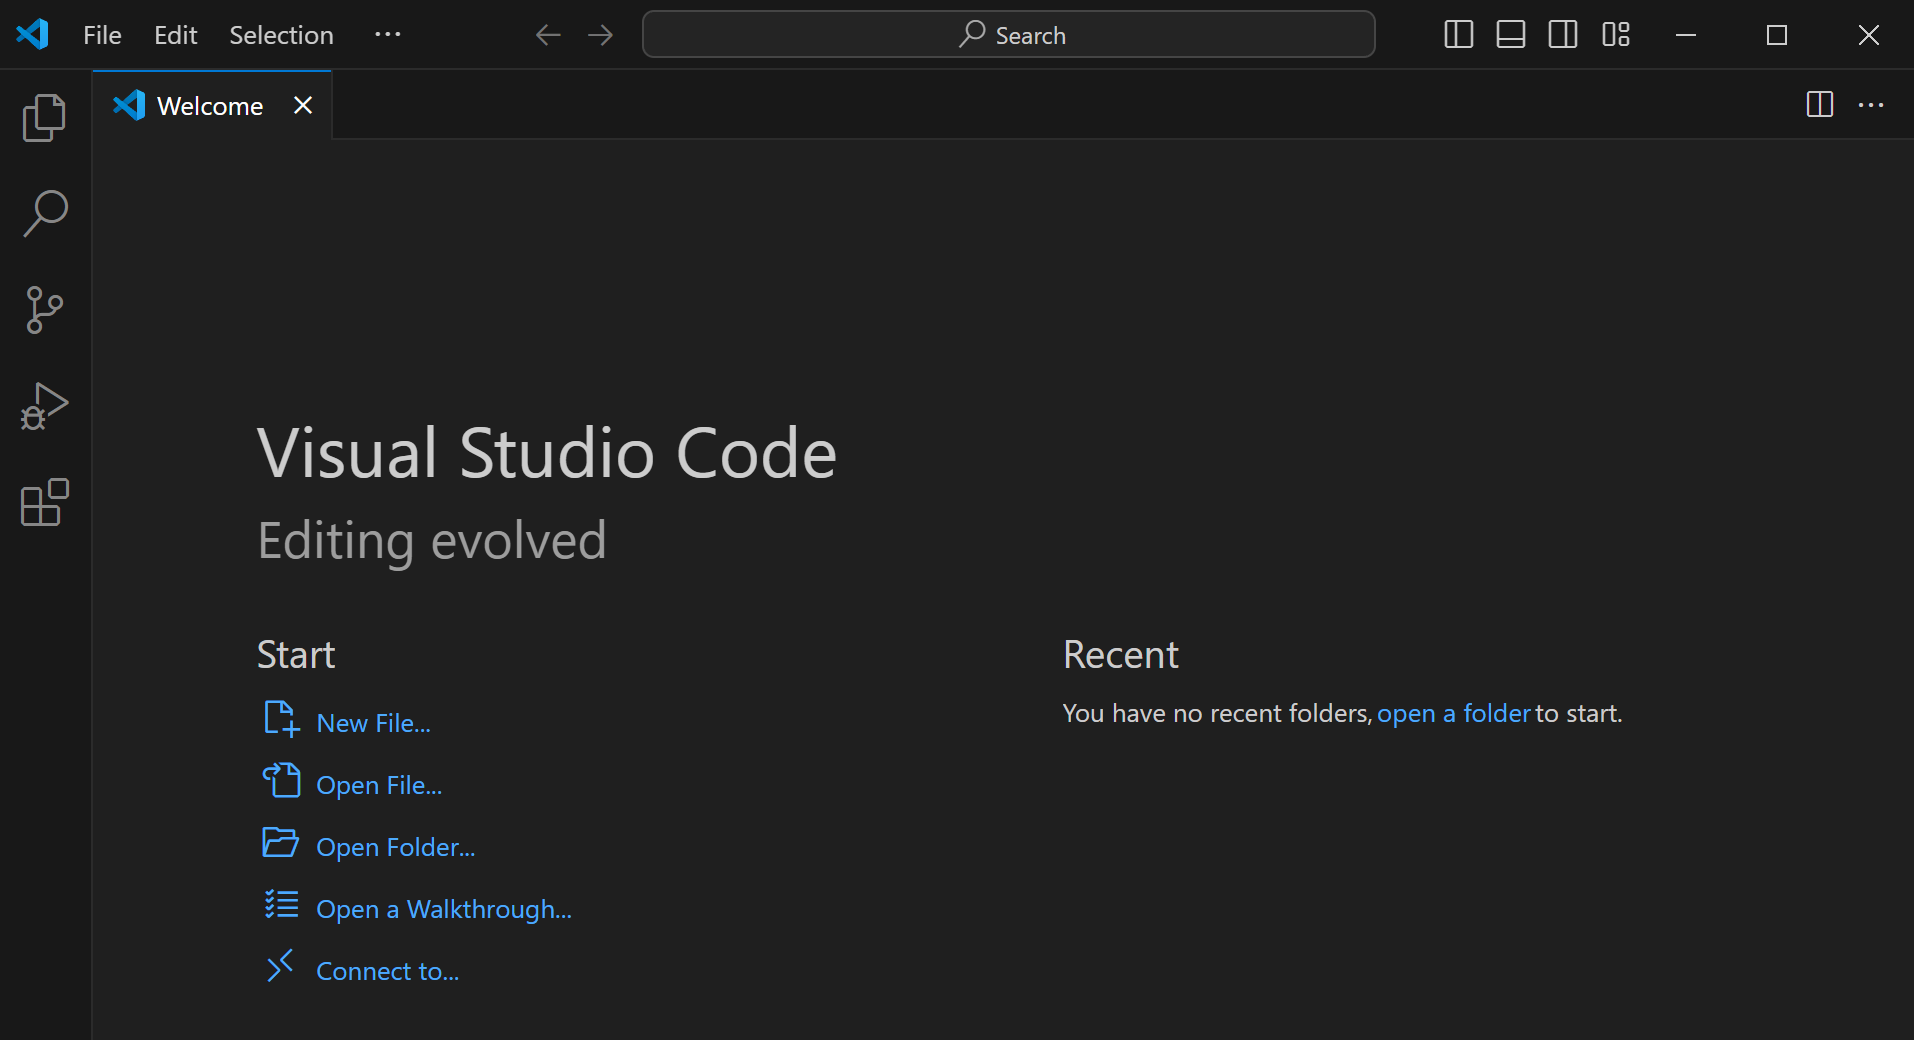
Open the newly-installed “Visual Studio Code” from the Start menu.
Definition of Success: You can open VSCode, and get an application window looking like this:
[OPTIONAL] Step 6: Configure VS Code#
VS Code comes with core functionality, but there are a few extra extensions we’ll be relying on for the course.
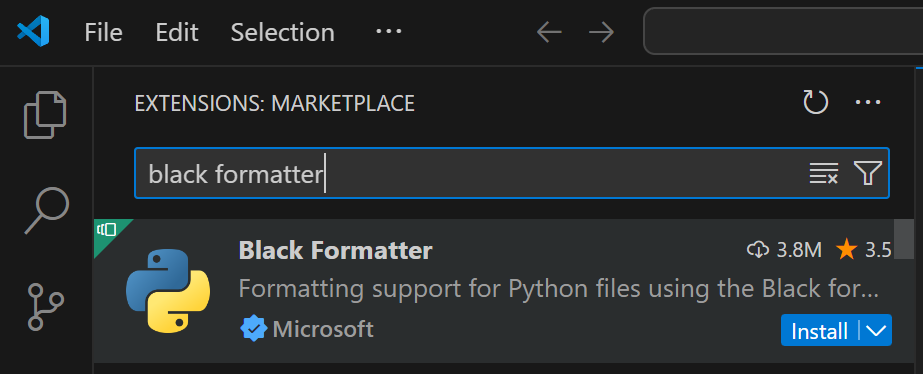
Open the extensions side panel using the extensions icon in the sidebar:

Search for and install the following extensions (all are authored by
 ):
):Python
Jupyter
Black Formatter (not the extension just called “Black”!)
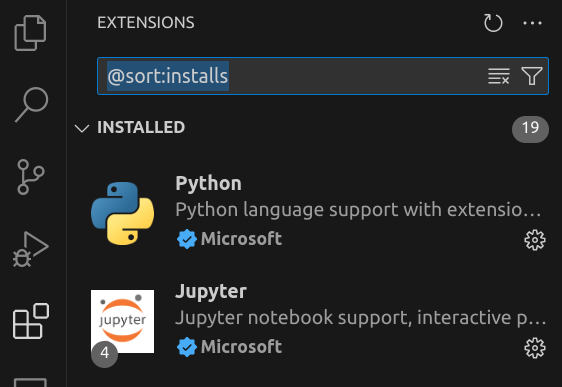
Definition of Success: You can see all three extensions under the “Installed” section of the extensions side panel. (You may see more extensions than the three above, as VS Code comes with some preinstalled).
How to Run .py Files in VS Code#
Running a .py file in VS Code is straightforward:
Step-by-Step Guide:
Open Your Python File:
Ensure you have the Python extension installed. Open the
.pyfile in VS Code.
Set Up Python Environment:
Check the bottom-left corner of VS Code or click the Python interpreter selector in the bottom-right to choose the correct Python environment for running your file.
Run the File:
Use the shortcut CTRL + F5 (Windows/Linux) or Cmd + F5 (Mac) to run without debugging.
Alternatively, use F5 to run the script with debugging.
Built-in Terminal:
The output will appear in the integrated terminal at the bottom. If a terminal isn’t open, VS Code will create one for you.
Using the Run Button:
In the top-right corner of the editor, there’s a green play button (Run Python File). Click it to execute the file.
How to Make .ipynb markdown-like Cells in VS Code#
VS Code supports Notebook-like functionality using “Python Interactive” or Jupyter Notebook integration.
Option 1: Use Code Cells in a .py File
Write a Cell: Use the comment # %% to define a cell. For example:
# %%
print("This is a cell")

# %%
print("This is another cell")
Run a Cell: Place your cursor inside the cell and click the Run Cell button that appears next to it. Alternatively, use the shortcut CTRL + ENTER (Windows/Linux) or CMD + ENTER (Mac).
View Output: The output will appear in the Python Interactive window.
Option 2: Use
.ipynbFiles
Create or Open a Jupyter Notebook: Open an existing
.ipynbfile (such as this one) or create a new one by selecting File > New File, then changing the language to Jupyter Notebook, or saving it as .ipynb.Install Jupyter Support: Make sure the Jupyter extension is installed (usually bundled with the Python extension).
Interactive Features: Add cells using the + button or shortcuts, and execute them just like you would in a browser-based Jupyter Notebook.
Integrated Environment: This mode is ideal for those who prefer a fully interactive, notebook-like experience.